
FAQ
Explore with your favorite AI
 ChatGPT
  Claude
 Gemini & other AI
Copy this page’s context into your AI to explore how it works and what you can build.
 Open Gemini
 Copy the prompt, then paste it into Gemini’s message box.
View prompt
This page covers first-time questions such as “Which leaf do I have?” as well as checks when something does not work. Start with the item that matches your question. You can also use the question template for questions about your code or development tools.
Identifying leaves
- How do I identify the leaf I have?
- Does the letter at the end of the model number matter?
- What if I cannot find or read the model number?
Power and assembly
Computer connections and uploads
Display and wireless connections
How do I identify the leaf I have?
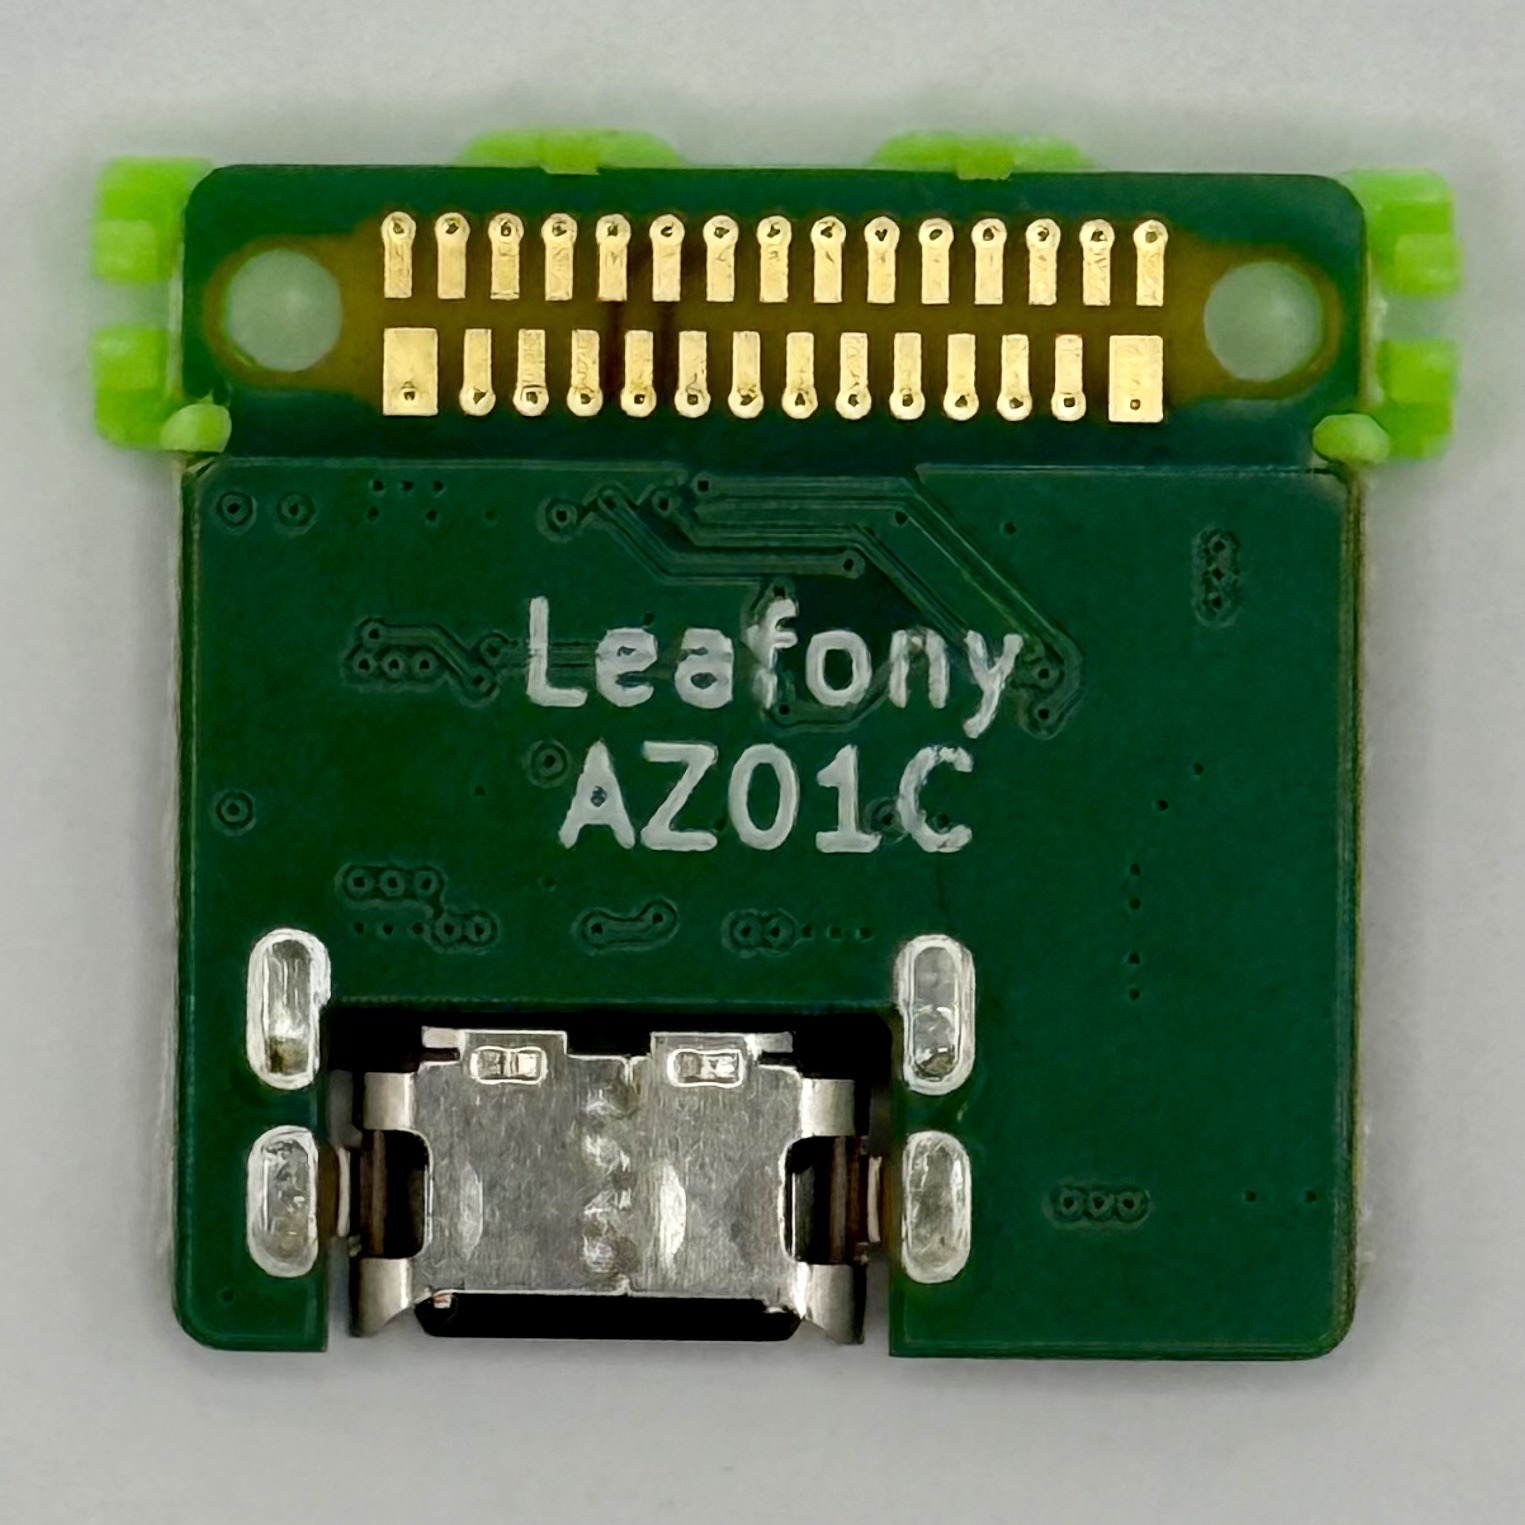
Section titled “How do I identify the leaf I have?”Look for the model number (part number) printed on the board. Start with the back. Many leaves have a code such as AZ01C or AI04A printed on the back. The position varies by leaf, so check the front too if you cannot find it.
- Look for text on the board itself. Black components may also have text on them, but those markings identify the components. The leaf’s model number is printed directly on the board.
- Read the complete model number. For example, if it says
AZ01C, include the finalCwhen you write it down. - Open the matching documentation from the leaf catalog. Compare the model number, front and back photos, and features such as the USB connector or display with the leaf you have.
| Example marking on the board | What the leaf does | Documentation |
|---|---|---|
AZ01C | Connects to a computer via USB-C | AZ01C USB-C |
AI04A | Displays text and numbers | AI04 LCD |
AP01A | Runs a program | AP01 AVR MCU |
Before separating stacked leaves to check the markings, unplug the USB cable and disconnect batteries and any other power sources.
Does the letter at the end of the model number matter?
Section titled “Does the letter at the end of the model number matter?”Yes. Include the complete printed model number when asking for help or checking instructions.
A page title may use a shorter name such as AP01 or AI04, while the board is marked AP01A, AP01B or AI04A. Different suffixes may indicate differences in board specifications or operating procedures. For example, AZ01 USB and AZ01C USB-C have different USB connectors and reset procedures when uploading to AP01.
After opening the documentation, check that the instructions apply to the model you have.
What if I cannot find or read the model number?
Section titled “What if I cannot find or read the model number?”Try taking photos of both sides of the board with your smartphone and zooming in. If the markings are hidden in a stack, you can also compare the leaves listed on your kit’s product page with the photos in the leaf catalog.
If you are still unsure, use the Leafony Shop contact page (Japanese) to ask for help. Include any text you can read and the kit name if you know it. If photos of both sides are needed, follow the support team’s instructions for sending them. Disconnect power first if you need to separate the leaves to take photos.
If it doesn’t turn on…
Section titled “If it doesn’t turn on…”If Leafony won’t turn on, check the following:
- Is there enough remaining battery power?
- Is the button battery inserted in the correct direction?
- Is the power switch turned on?
- Are the connectors clean? If they are dirty, wipe them lightly with a paper wiper moistened with anhydrous ethanol. If the problem persists, replace the connectors. See Installing and removing connectors for details.
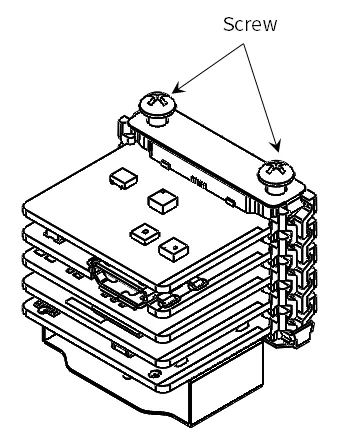
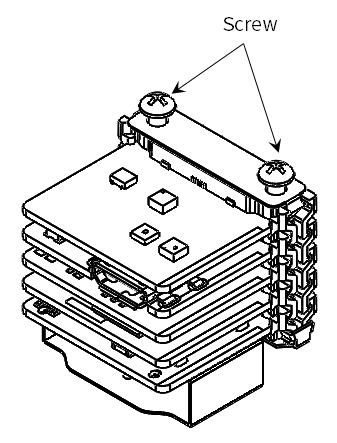
- Are the screws tight enough? If they are loose, tighten them alternately.
If you can’t find the serial port…
Section titled “If you can’t find the serial port…”If you cannot find a Leafony serial port, check the following:
- Use a USB cable that supports data transfer. A two-wire power-only USB cable cannot carry data.
- Check that the driver required by your USB leaf is installed. See these resources for FTDI USB serial converter drivers:
Upload fails
Section titled “Upload fails”Read the complete IDE error message, then open the instructions for your microcontroller and USB leaf.
- AP01 / AP01B (AVR MCU) + AZ01C (USB-C): Follow the AZ01C upload instructions to check the board and port settings and the manual reset procedure.
- Other configurations: Use development environment setup to select the instructions for AP01 (AVR), AP02 (ESP32) or AP03 (STM32) and your development tools.
No text appears on the LCD
Section titled “No text appears on the LCD”For AI04, see the AI04 LCD documentation and select the LCD example for your processor in the example catalog.
BLE will not connect or no device is found
Section titled “BLE will not connect or no device is found”Use the guide that matches your kit and the program currently installed on it to check supported devices, browsers and connection methods.
- The preinstalled AVR MCU demo in Basic Kit or Basic Kit 2: Follow the Basic Kit getting started guide for your Android device, computer, iPhone or iPad.
- The preinstalled STM32 MCU demo in Basic Kit 2: See the Basic Kit 2 getting started guide for beacon reception, connections and browser requirements.
- After uploading an example or your own program: Open the relevant article in the example catalog and check that program’s instructions, including its device name and receiving application. Its behavior may differ from the preinstalled demos above.
ESP32 Wi-Fi cannot connect or the demo page will not open
Section titled “ESP32 Wi-Fi cannot connect or the demo page will not open”This checklist is for the preinstalled touch-sensor demo in ESP32 Wi-Fi Kit / Kit 2. Work from the first stage that fails.
| Stage | What to check |
|---|---|
Leafony_ESP32-AP does not appear | Power, battery orientation and charge, and whether the MCU still contains the demo. Another sketch will not necessarily create this network. |
| The network appears but connection fails | Select Leafony_ESP32-AP and enter password as shown in the getting started guide. Use the new credentials if you changed the sketch. |
| Connected, but the page does not open | Confirm that the device is still connected to Leafony’s Wi-Fi. Enter http://192.168.4.1 in the address bar, including http://. This demo serves a local page and does not require an internet connection. If asked whether to stay on a network without internet, keep the Leafony connection. |
| The page opens but readings do not change | Touch pin 26 as shown in the guide. If automatic updates are stopped, select 1 second or reload the page. Check the pin assignment before touching other pins. |
If you changed the program, use the SSID and address configured by that program. Record the last successful stage and any messages when using the question template.
Restore the kit demo after uploading another program
Section titled “Restore the kit demo after uploading another program”Resetting or cycling power restarts the uploaded program; it does not restore the preinstalled sketch. Select the demo for the MCU you have, then upload its source again.
| MCU / kit | Demo to upload | Where to check the result |
|---|---|---|
| AP01 AVR in Basic Kit / Basic Kit 2 | Web Bluetooth IoT example, using the 4-Sensors_BLE source linked there | Basic Kit guide: connect to Leafony_AC02 and view readings |
| AP03 STM32 in Basic Kit 2 | STM32 Logger Beacon | Basic Kit 2 guide: connect, record, then read data |
| AP02 ESP32 in ESP32 Wi-Fi Kit / Kit 2 | Wi-Fi touch sensor | ESP32 guide: join Leafony_ESP32-AP and view touch readings |
Before uploading, check the example’s required leaves and libraries and follow setup for your MCU. Save any source code you want to keep. Re-uploading a demo does not necessarily reset settings or erase stored measurements; follow that demo’s instructions for those operations.
Still need help?
Section titled “Still need help?”If you are stuck on your code or development tools, use the Leafony Shop contact page (Japanese). Include the checks you performed and their results. Even if you do not know the cause, tell us what you did and what happened.
Use the question template to organize your inquiry. The same Leafony Shop contact page also accepts questions about purchases or faults.