
ESP32 Wi-Fi Kit / Kit 2 Getting Started Guide
Set up with your favorite AI
 ChatGPT
  Claude
 Gemini & other AI
Copy the setup prompt into your AI. Work through each step together, from checking your kit to getting it running.
 Open Gemini
 Copy the prompt, then paste it into Gemini’s message box.
View prompt
Use the preinstalled AP02 ESP32 demo to display touch-sensor readings in a phone or computer browser over Wi-Fi. No program upload or development environment is needed. This guide uses three AAA batteries. Before using an 18650 holder instead, check the battery requirements.
Leaves included in the kit
Section titled “Leaves included in the kit”The following leaves are shared by ESP32 Wi-Fi Kit and Kit 2.
5 types of leaves. Select a photo or name for specifications and pin assignments.


Accessories differ between kits. Check the complete contents of ESP32 Wi-Fi Kit (Japanese) or ESP32 Wi-Fi Kit 2 (Japanese).
What to prepare
Section titled “What to prepare”- ESP32 Wi-Fi Kit / Kit 2 with the demo still installed
- Three AAA alkaline batteries and the kit's holder
- A Wi-Fi-enabled phone or computer with a web browser
-
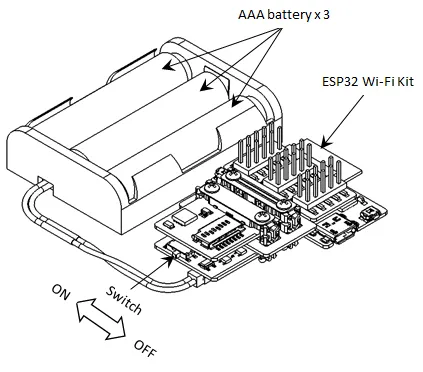
Install three AAA batteries as shown and turn the power switch ON.
-
On the phone or computer, connect to Wi-Fi with SSID Leafony_ESP32-AP and password password. This connection is directly to Leafony; internet access is not needed for the demo. If asked whether to stay connected without internet, keep this connection.
-
Enter
http://192.168.4.1in the browser's address bar, includinghttp://. -
Identify pin 26 on the 29pin header using the picture, then touch it. The value decreases when touched. At 20 or lower, Touch detected appears.
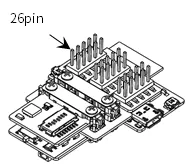
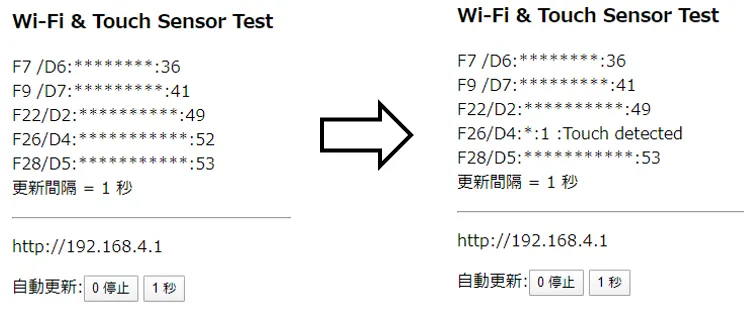
The demo displays touch inputs on pins 7, 9, 22, 26 and 28. Pin 24 is omitted because it conflicts with RTC & microSD. Once the page appears and pin 26 changes the reading, the initial check is complete. If updates are stopped, select 1 second or reload the page.
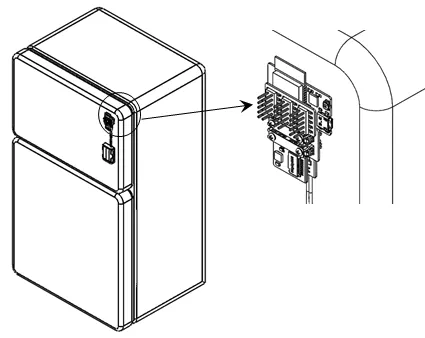
The magnet attached to the kit's Nut Plate lets you mount it on a metal surface.
Troubleshooting
Section titled “Troubleshooting”Follow the ESP32 Wi-Fi checks for the stage that fails: network discovery, connection, page display or sensor readings. If you uploaded another program, use Restore the demo.
Next steps
Section titled “Next steps”The Wi-Fi touch sensor example explains how to upload the source and change the detection threshold. Use development environment setup when you are ready to change the program.