Arduino IDE Settings for AVR MCU
Leafony only works when you write a program.
For example, in Quick Start, a program has been written to read the four sensors and send data via Bluetooth LE.
If you are starting to use Leafony, you can make it work the way you want it to by writing a program that describes what you want it to do.
What to prepare
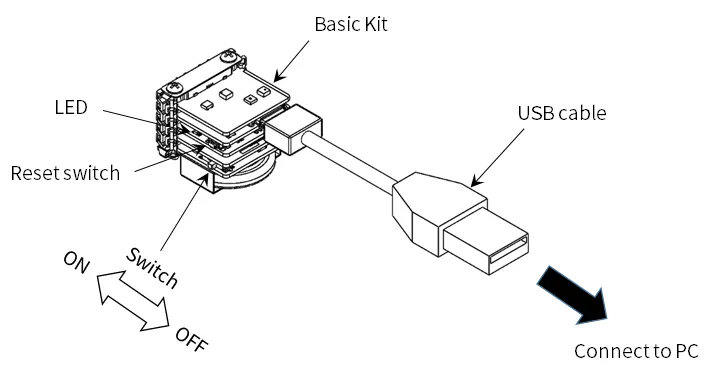
Section titled “What to prepare”- Basic Kit
- USB cable
- PC (Windows, Mac OS X or Linux)
Installing Arduino IDE
Section titled “Installing Arduino IDE”The Arduino IDE is a development environment for the Arduino, an open source hardware platform for electronics.
The development environment allows you to write programs, write programs to the Arduino board, and display the data coming from the board.
Leafony can be developed with the Arduino IDE.
Let’s download the Arduino IDE right away.
- From the Arduino website, go to
SOFTWAREand thenDOWNLOADSto get to the Arduino IDE download page. - Download the installer for your OS at the place where it says
Download the Arduino IDE. - Run the downloaded installer and follow the on-screen instructions to install the Arduino IDE.
How to download old versions of Arduino IDE and check and change Arduino AVR Boards
Section titled “How to download old versions of Arduino IDE and check and change Arduino AVR Boards”Refer to Version of the Arduino IDE.
Connecting to PC
Section titled “Connecting to PC”Connect to your PC with a USB cable.
Configuration of the microcontroller board
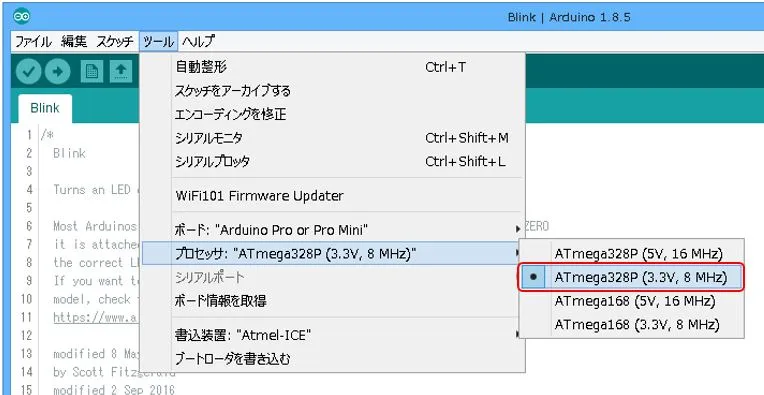
Section titled “Configuration of the microcontroller board”To develop Leafony in the Arduino IDE, let’s follow the steps below to configure the IDE.
- Go to
Tools → Boardand selectArduino Pro or Pro MiniandATmega328P (3.3V, 8MHz)forProcessor.
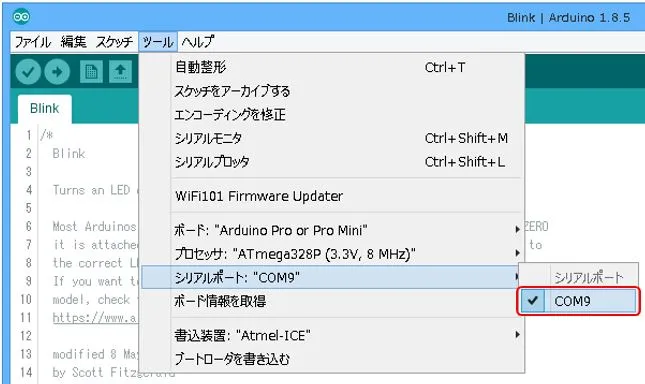
- Go to
Tools → Serial Portand select the serial port that Leafony is connected to
Checking the operation of the microcontroller board
Section titled “Checking the operation of the microcontroller board”- In the Arduino IDE, click on
File → Sketch Examples → 01.Basics → Blinkto open the sample app. - The program is written to Leafony by pressing the
write to microcontrollerbutton. - If you can confirm that the LED on the AVR MCU leaf is blinking, you are done.
Specifying pins for a sketch
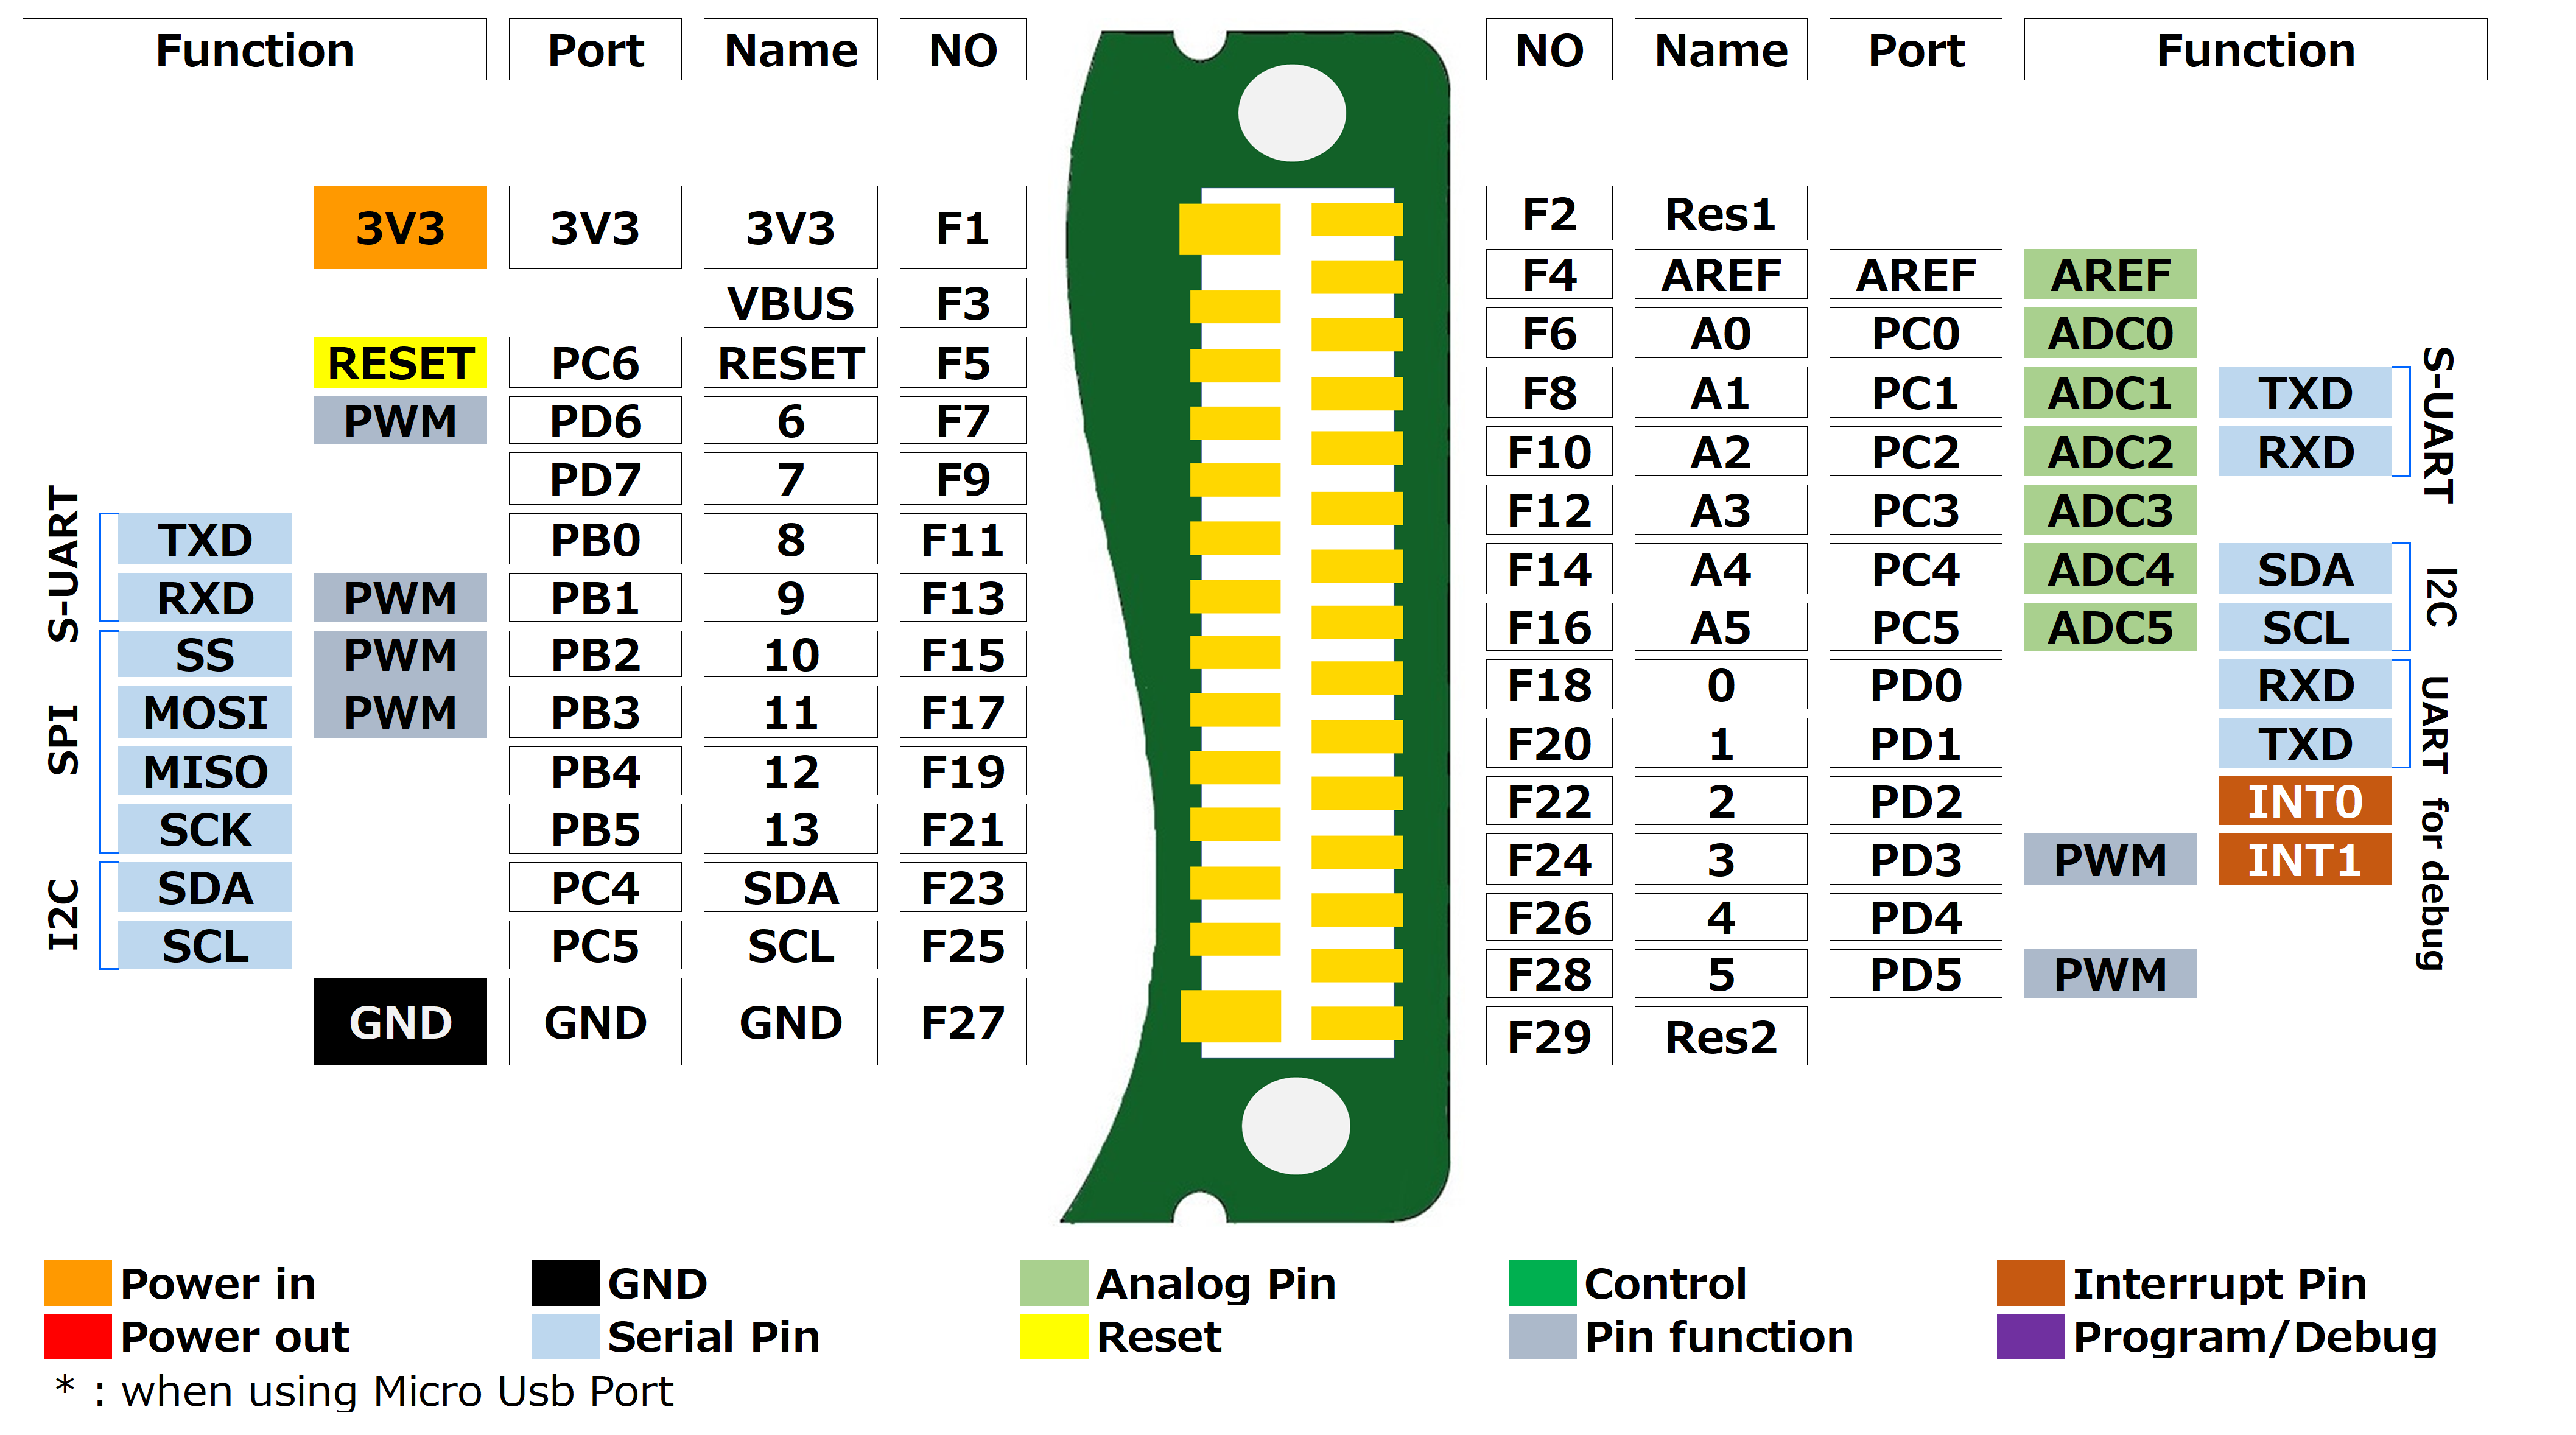
Section titled “Specifying pins for a sketch”The pin should be specified by its name.
Installing Libraries
Section titled “Installing Libraries”To use some of the leaves, you will need to install additional libraries.
Follow the steps below to install all libraries in advance.
1. Library to use
Section titled “1. Library to use”The libraries used in each Kit are as follows.
| Leaf | Required Library | Recommended version | Description |
|---|---|---|---|
| BLE | TBGLib | Bluetooth Library | |
| 4-Sensors | Adafruit_Sensor.h | Unified Sensor Driver | |
| Adafruit_BusIO_Register.h | Bus IO Library | ||
| HTS221.h | Temperature and humidity sensor library | ||
| ClosedCube_OPT3001.h | Illuminance sensor library | ||
| Adafruit_LIS3DH.h | 1.1.2 | Accelerometer Library | |
| LCD | ST7032.h | LCD Library | |
| AVR MCU | MsTimer2.h | Timer interrupt library | |
| RTC&MicroSD | RTClib.h | RTC Library |
2. Download Library
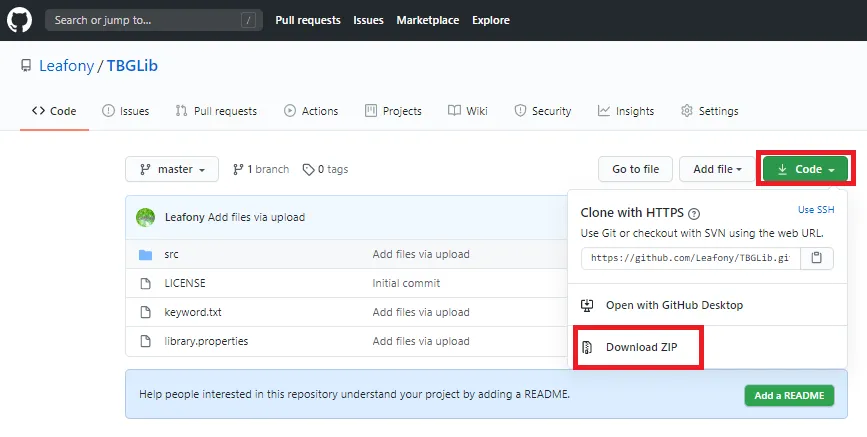
Section titled “2. Download Library”Clicking on the links in the table above will take you to the library’s GitHub repository.
Click Code → Download ZIP to download the library.
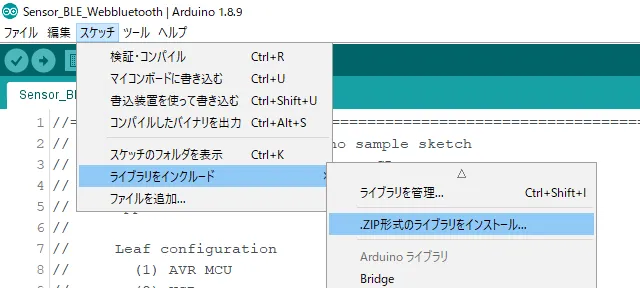
3. Include Library
Section titled “3. Include Library”Launch the Arduino and choose Sketch → Include Library → Install ZIP Library to load the zip file you just downloaded.
When in doubt.
Section titled “When in doubt.”If it doesn’t work, go to “If it doesn’t work…” to find a solution.