
KiCad Template Project
Explore with your favorite AI
 ChatGPT
  Claude
 Gemini & other AI
Copy this page’s context into your AI to explore how it works and what you can build.
 Open Gemini
 Copy the prompt, then paste it into Gemini’s message box.
View prompt
Overview
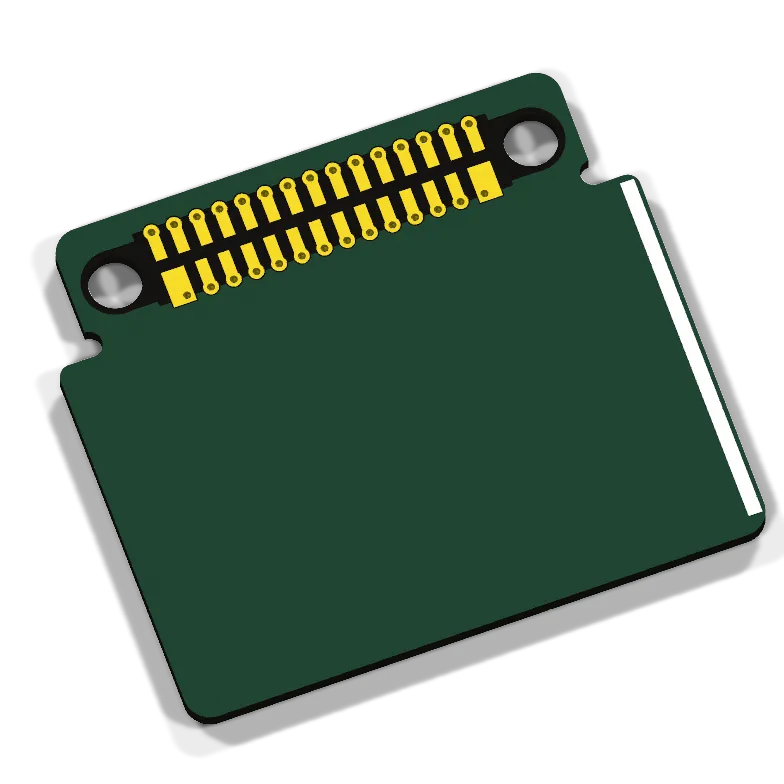
Section titled “Overview”The Leafony template for KiCad lets you start designing an expansion leaf with the Leafony bus contacts and board outline already configured. It includes a schematic, PCB, dedicated symbol and footprint libraries, layer configuration, and design rules.
The setup and usage instructions on this page are based on the KiCad template README on GitHub (Japanese).
Development environment
Section titled “Development environment”- KiCad 10.0.x
- KiCad’s standard symbol and footprint libraries
When starting KiCad for the first time, choose the option to use its standard libraries. If your system provides the libraries as separate packages, as on some Linux distributions, install those packages as well. Power symbols in the schematic use the standard power library.
Download
Section titled “Download”On GitHub - leafony/cad-template, select Code → Download ZIP and extract the archive. If you use Git, you can download the repository with this command:
git clone https://github.com/leafony/cad-template.gitDownload the entire folder, since the project also needs its libraries and other referenced files. In the paths below, replace cad-template with the actual folder where you cloned the repository or extracted the ZIP archive.
Main files
Section titled “Main files”The following files and folders are inside cad-template/KiCad/Leafony_Template/.
| Path | Purpose |
|---|---|
Leafony_Template.kicad_pro | Project settings, design rules, and net classes |
Leafony_Template.kicad_sch | Schematic with the Leafony bus, power connections, and signal labels |
Leafony_Template.kicad_pcb | PCB with the board outline, contacts, vias, and copper zone keepouts |
lib/Leafony.kicad_sym | Leafony Bus symbol |
lib/Leafony.pretty/ | CN_F29_B29 footprint |
sym-lib-table | Project-specific symbol library table; empty as distributed |
fp-lib-table | Project-specific footprint library table; Leafony is already registered |
meta/ | Template name, description, icon, and preview image |
Register lib/Leafony.kicad_sym as the symbol library, rather than the legacy files leafony_template-cache.lib, lib/Leafony.dcm, or lib/Leafony.bak. The .kicad_prl and fp-info-cache files contain personal settings and cached data; they are not libraries to register.
Register the user template
Section titled “Register the user template”- Launch the KiCad project manager.
- Open Preferences → Configure Paths…. Menu names may vary with your OS and display language.
- Set
KICAD_USER_TEMPLATE_DIRto the absolute path of theKiCadfolder in the downloaded repository. - Save the settings. If the template does not appear in the list, restart KiCad.
| OS | Example setting |
|---|---|
| Windows | C:/Users/your-name/Documents/cad-template/KiCad |
| macOS | /Users/your-name/Documents/cad-template/KiCad |
| Linux | /home/your-name/cad-template/KiCad |
This variable must point to the parent folder containing Leafony_Template. Check that Leafony_Template/meta/info.html exists under the configured folder.
If you already use another user template folder, you can keep that setting and copy the entire Leafony_Template folder into it.
Create a new project
Section titled “Create a new project”- In the project manager, select File → New Project….
- Select Leafony Leaf from the template list. Filter the list to user templates if needed.
- Click OK, then choose a working folder and a new project name, such as
my_leaf. - Open the generated
my_leaf.kicad_pro, then launch the schematic and PCB editors from the project manager.
The template files are copied into the new project, and the main files are renamed to match the project name. The lib folder and library tables are also copied. Save the new project in a different location from the original template folder.
To inspect the template, you can open Leafony_Template/Leafony_Template.kicad_pro directly. To design your own leaf, edit the newly created project.
Configure the symbol library
Section titled “Configure the symbol library”The template’s sym-lib-table, copied into the new project, is empty as distributed. Placed symbols are also stored in the schematic, but you must register the library to add or reference symbols from it.
- Open the schematic editor from the project manager.
- Open Preferences → Manage Symbol Libraries….
- Select Project Specific Libraries.
- Use the option to add an existing library and select
lib/Leafony.kicad_syminside your new project. - Set the entries to the following values, enable the library, and save.
| Field | Value |
|---|---|
| Nickname | Leafony |
| Library path | ${KIPRJMOD}/lib/Leafony.kicad_sym |
| Library format | KiCad |
${KIPRJMOD} is the current project folder, set automatically by KiCad. You do not need to add or change it in the path settings.
Check that Leafony:Leafony Bus appears in the symbol chooser. If you are using the existing CN1, you do not need to place another symbol just to check the library.
Check the footprint library
Section titled “Check the footprint library”The footprint library is already registered in fp-lib-table, so no additional setup is normally needed. In the PCB editor, open Preferences → Manage Footprint Libraries… and check the project-specific libraries.
| Field | Value |
|---|---|
| Nickname | Leafony |
| Library path | ${KIPRJMOD}/lib/Leafony.pretty |
| Library format | KiCad |
The library is configured correctly if Leafony:CN_F29_B29 appears. If you register it again, select the Leafony.pretty folder, not an individual .kicad_mod file.
When moving or sharing the project with another PC, copy the entire project, including the lib folder and library tables, to preserve the relative references using ${KIPRJMOD}.
Start designing
Section titled “Start designing”Template defaults
Section titled “Template defaults”The values below are the settings in the included files. Check the layer configuration, manufacturing constraints, and net classes in Board Setup, and compare them with your manufacturer’s requirements.
| Item | Default value |
|---|---|
| Board outline | Maximum Edge.Cuts dimensions: 23 × 20 mm. The connector side is 20 mm wide, with extensions on both sides of the board |
| Copper layers | 4 layers: F.Cu / In1.Cu / In2.Cu / B.Cu |
| Board thickness | 0.8 mm |
| Bus contacts | CN1, with 29 contacts on each side (F1–F29 and B1–B29) |
| Mounting holes | Two non-plated holes, 2.05 mm in diameter |
| Minimum track width and minimum clearance | 0.1016 mm |
Track width for the Default net class | 0.127 mm |
Via diameter / drill diameter for the Default net class | 0.56 mm / 0.30 mm |
Copper zone keepouts are configured around the connector. Use the PCB data as the reference for the actual board outline, contact positions, and hole positions.
Edit the schematic and PCB
Section titled “Edit the schematic and PCB”- Check the pin assignments of the leaves you will use, then add components and wiring to the schematic. Verify the Leafony bus contact numbers and existing signal names as you connect them.
- Assign footprints to the added components and run the schematic’s electrical rules check (ERC).
- Select Tools → Update PCB from Schematic… to apply the changes to the PCB.
- Check the contact and mounting hole positions, as well as possible component interference with other leaves, then place the components and route the board.
- Refill the copper zones and run the design rules check (DRC) to check for unconnected items and manufacturing rule violations.
- Export the Gerber and drill files, and check them against your manufacturer’s requirements.
See the Custom Leaf Development resources for pin assignments and I2C addresses.
Troubleshooting
Section titled “Troubleshooting”| Symptom | What to check |
|---|---|
Leafony Leaf does not appear in the template list | Check that KICAD_USER_TEMPLATE_DIR points to the parent folder of Leafony_Template, with Leafony_Template/meta/info.html underneath it. Reopen the list or restart KiCad. |
| KiCad reports that the file format is too new | Check that you are opening the files with KiCad 10.0.x. |
The Leafony symbol library cannot be found | Register Leafony in the new project’s symbol library table. It is not registered in the distributed table. |
Leafony:CN_F29_B29 cannot be found | Check that the project contains lib/Leafony.pretty and fp-lib-table, and that the nickname and path match the settings above. |
Standard symbols such as power cannot be found | Check that KiCad’s standard libraries are installed and enabled in the global library table. |
| Libraries cannot be found after moving to another PC | Copy the lib folder as well, and check that library paths use ${KIPRJMOD} instead of absolute paths from the original PC. |
License
Section titled “License”The template is released under the MIT license.