Arduino IDE settings for STM32 MCU
Follow these steps to set up your STM32 MCU development environment.
What to prepare
Section titled “What to prepare”- STM32 MCU Leaf
- Basic Kit
- PC (Windows, Mac OS X or Linux)
Installing the Arduino IDE
Section titled “Installing the Arduino IDE”For instructions on how to install the Arduino IDE, please here.
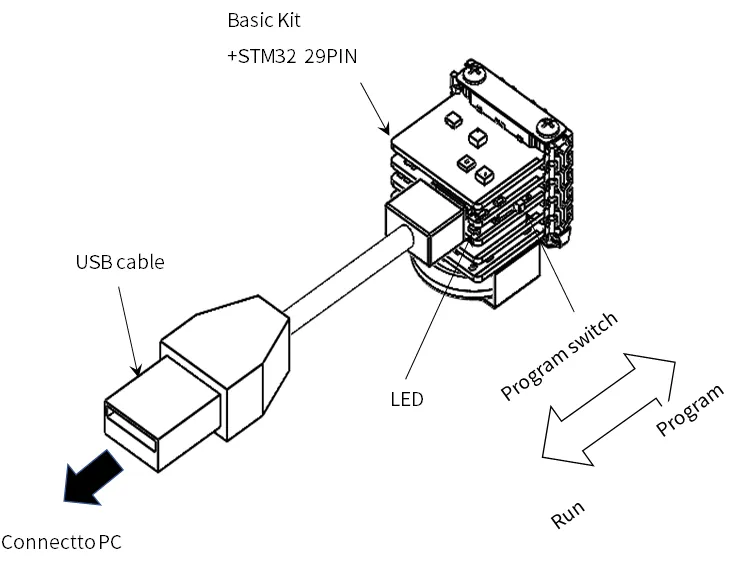
Connect to PC
Section titled “Connect to PC”Connect it to your PC with a USB cable.
Configuration of the microcontroller board
Section titled “Configuration of the microcontroller board”To use the STM32 MCU leaf with the Arduino IDE, the STM32 Cores must be installed. Please follow the steps below to configure the settings. (For more information about STM32 Cores, see here).
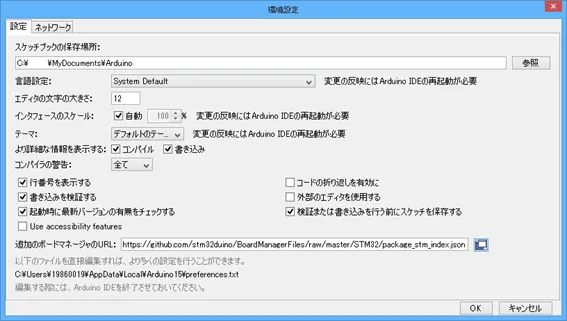
- Open the
File → Preferencesin the Arduino IDE and enter the following URL in theAdditional Board Manager URL:field.
https://github.com/stm32duino/BoardManagerFiles/raw/master/STM32/package_stm_index.json
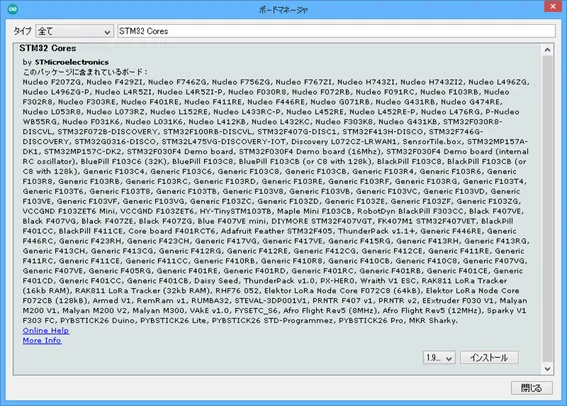
-
Select
Tools -> Board -> Board Manager, search for STM32 Cores and press theInstallbutton.
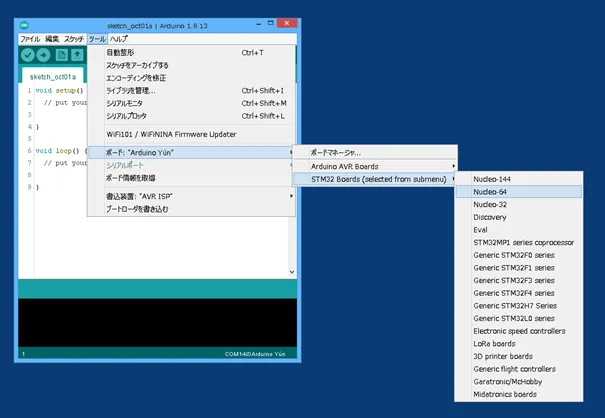
-
Go to
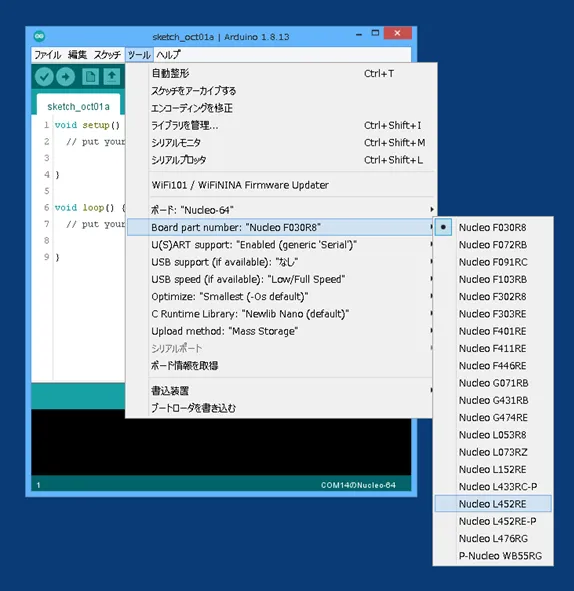
Tools → Board→ STM32 Boards (Selected from submenu)→ Nucleo-64.
-
Go to
Tools → Board part number: *****→ Nucleo L452RE.
-
Go to
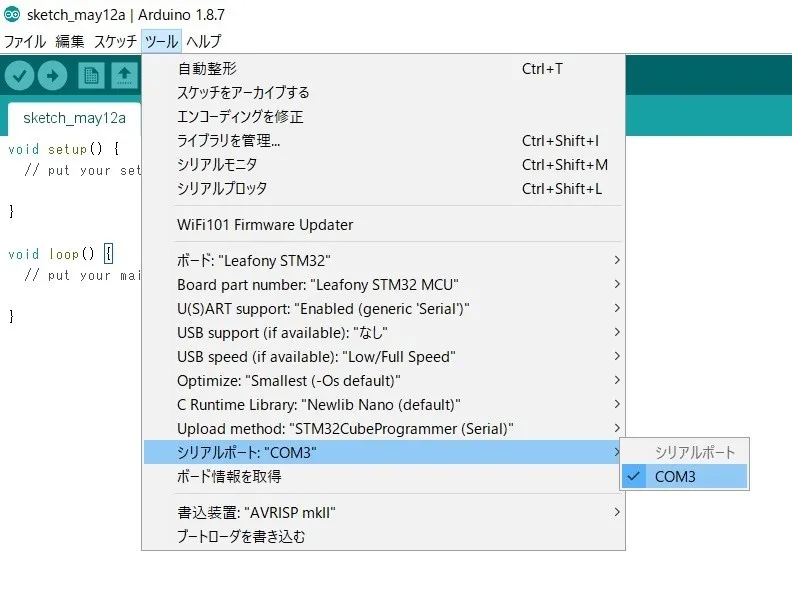
Tools → Upload method: ***** → STM32CubeProgrammer(Serial).

-
Go to
Tools → Serial Portand select the serial port to which Leafony is connected.
Installing the STM32CubeProg
Section titled “Installing the STM32CubeProg”To be able to write programs to the STM32 MCU leaf, you need to install STM32CubeProg 1.The STM32CubeProg can be downloaded and installed on your PC here.
Checking the operation of the microcontroller board
Section titled “Checking the operation of the microcontroller board”-
When the
program switchon the STM32 MCU leaf is set to the program side, the LED will light up.

-
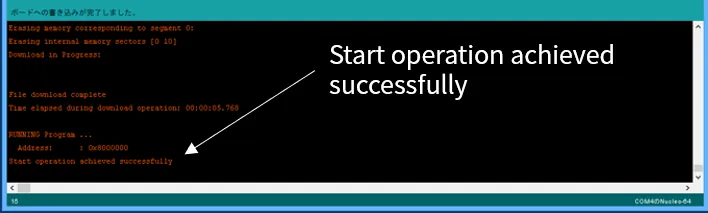
Next, refer to the sample application “Temperature and humidity sensor” and write the program. If it is written successfully, the message
Start operation achieved successfullywill be displayed.If it is not displayed 2, be careful.
-
When writing is complete, turn the STM32 MCU leaf’s
Program switchto the Run side to turn off the LED. -
Press the
Reset switchon the STM32 MCU leaf.
Specifying pins for a sketch
Section titled “Specifying pins for a sketch”Since the pin layout of the STM32 MCU is different from that of the Nucleo L452RE, it is not possible to use names when specifying pins. For STM32 MCU leaf, specify pins by port (Port)。

Installing libraries
Section titled “Installing libraries”To use some of the leaves, you will need to install additional libraries. Here to install all libraries in advance. However, you cannot use the timer interrupt library (MsTimer2.h) because it is an AVR MCU library. Please refer to the following HardwareTimer.
HardwareTimer
Section titled “HardwareTimer”An example of use is given below. For more information here.
Initialization
HardwareTimer *timer2 = new HardwareTimer (TIM2);
  timer2->setOverflow(LOOP_INTERVAL, MICROSEC_FORMAT);       // 125ms  timer2->attachInterrupt(intTimer);  timer2->resume();
Interrupt routine
void intTimer(void){ bInterval = true; : :}When in doubt
Section titled “When in doubt”You can find the solution in “If it doesn’t work…”.
Footnotes
Section titled “Footnotes”-
We have confirmed that V2.6.0 and V2.4.0 work on Windows 64bit. However, please note that V2.5.0 will not work. ↩
-
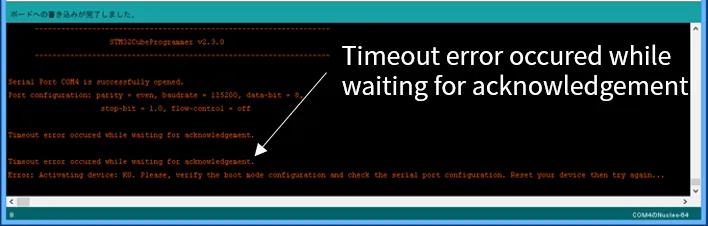
When writing without the program switch on the program side, the message
Writing to the board is completeis also displayed, but the bottom of the screen showsTimeout error occured while waiting for acknowledgement.
 ↩
↩