
STM32 MCU: STM32CubeIDE Setup
Set up with your favorite AI
 ChatGPT
  Claude
 Gemini & other AI
Copy the setup prompt into your AI. Work through each step together, from checking your kit to getting it running.
 Open Gemini
 Copy the prompt, then paste it into Gemini’s message box.
View prompt
Introduction
Section titled “Introduction”Use the Eclipse-based STM32CubeIDE to build a program for AP03 / STM32L452REI6, upload it using STM32CubeProgrammer, and display Hello World every second over a serial connection. For a first Arduino sketch, use the Arduino IDE or PlatformIO guide instead.
The original screenshots and workspace names use STM32CubeIDE 1.11.2. From version 2.0.0, STM32CubeMX is a separate tool: configure peripherals and generate the project there, then open it in STM32CubeIDE. See ST’s release announcement. Use the branch below that matches your tools.
What to prepare
Section titled “What to prepare”- AP03 STM32 MCU, a USB leaf, and a data-capable USB cable (swap the AVR MCU if using Basic Kit 2)
- A computer supported by the tools below
- STM32CubeIDE, STM32CubeMX for project generation, and STM32CubeProgrammer
- A serial terminal such as Tera Term on Windows
Preparation
Section titled “Preparation”
Install the STM32CubeIDE
Section titled “Install the STM32CubeIDE”Download the Eclipse-based edition from the ST product page and follow the installer for your OS. Install STM32CubeMX separately for the 2.x workflow. Use the installation requirements for the version you selected.
Install STM32CubeProgrammer
Section titled “Install STM32CubeProgrammer”Install STM32CubeProgrammer for UART uploads through the USB leaf.
Install a serial terminal
Section titled “Install a serial terminal”For Windows, obtain Tera Term from the official project. On macOS or Linux, use a serial terminal that can select the connected port and a baud rate of 115200.
Quick start
Section titled “Quick start”You can start from the existing Hello_World project using Import a project, or generate your own project as follows.
Create a project
Section titled “Create a project”- For CubeIDE 2.x: open STM32CubeMX and create a project for MCU
STM32L452REI6. For the original 1.x integrated UI: choose File → New → STM32 Project, use MCU/MPU Selector, enterSTM32L452REI6in Commercial Part Number, then select the device. - Name the project
Hello_Worldand choose a local folder. With separate CubeMX, selectSTM32CubeIDEas the toolchain. With the original integrated wizard, the example used C++, Executable and STM32Cube. - Continue with peripheral settings below. Generate the project from CubeMX or the integrated UI, then open it in STM32CubeIDE.
Configure the device and generate initialization code
Section titled “Configure the device and generate initialization code”- In Pinout & Configuration, assign
PA2toUSART2_TXandPA3toUSART2_RX. - Open Connectivity → USART2, choose Asynchronous, disable hardware flow control, and set the baud rate to
115200.
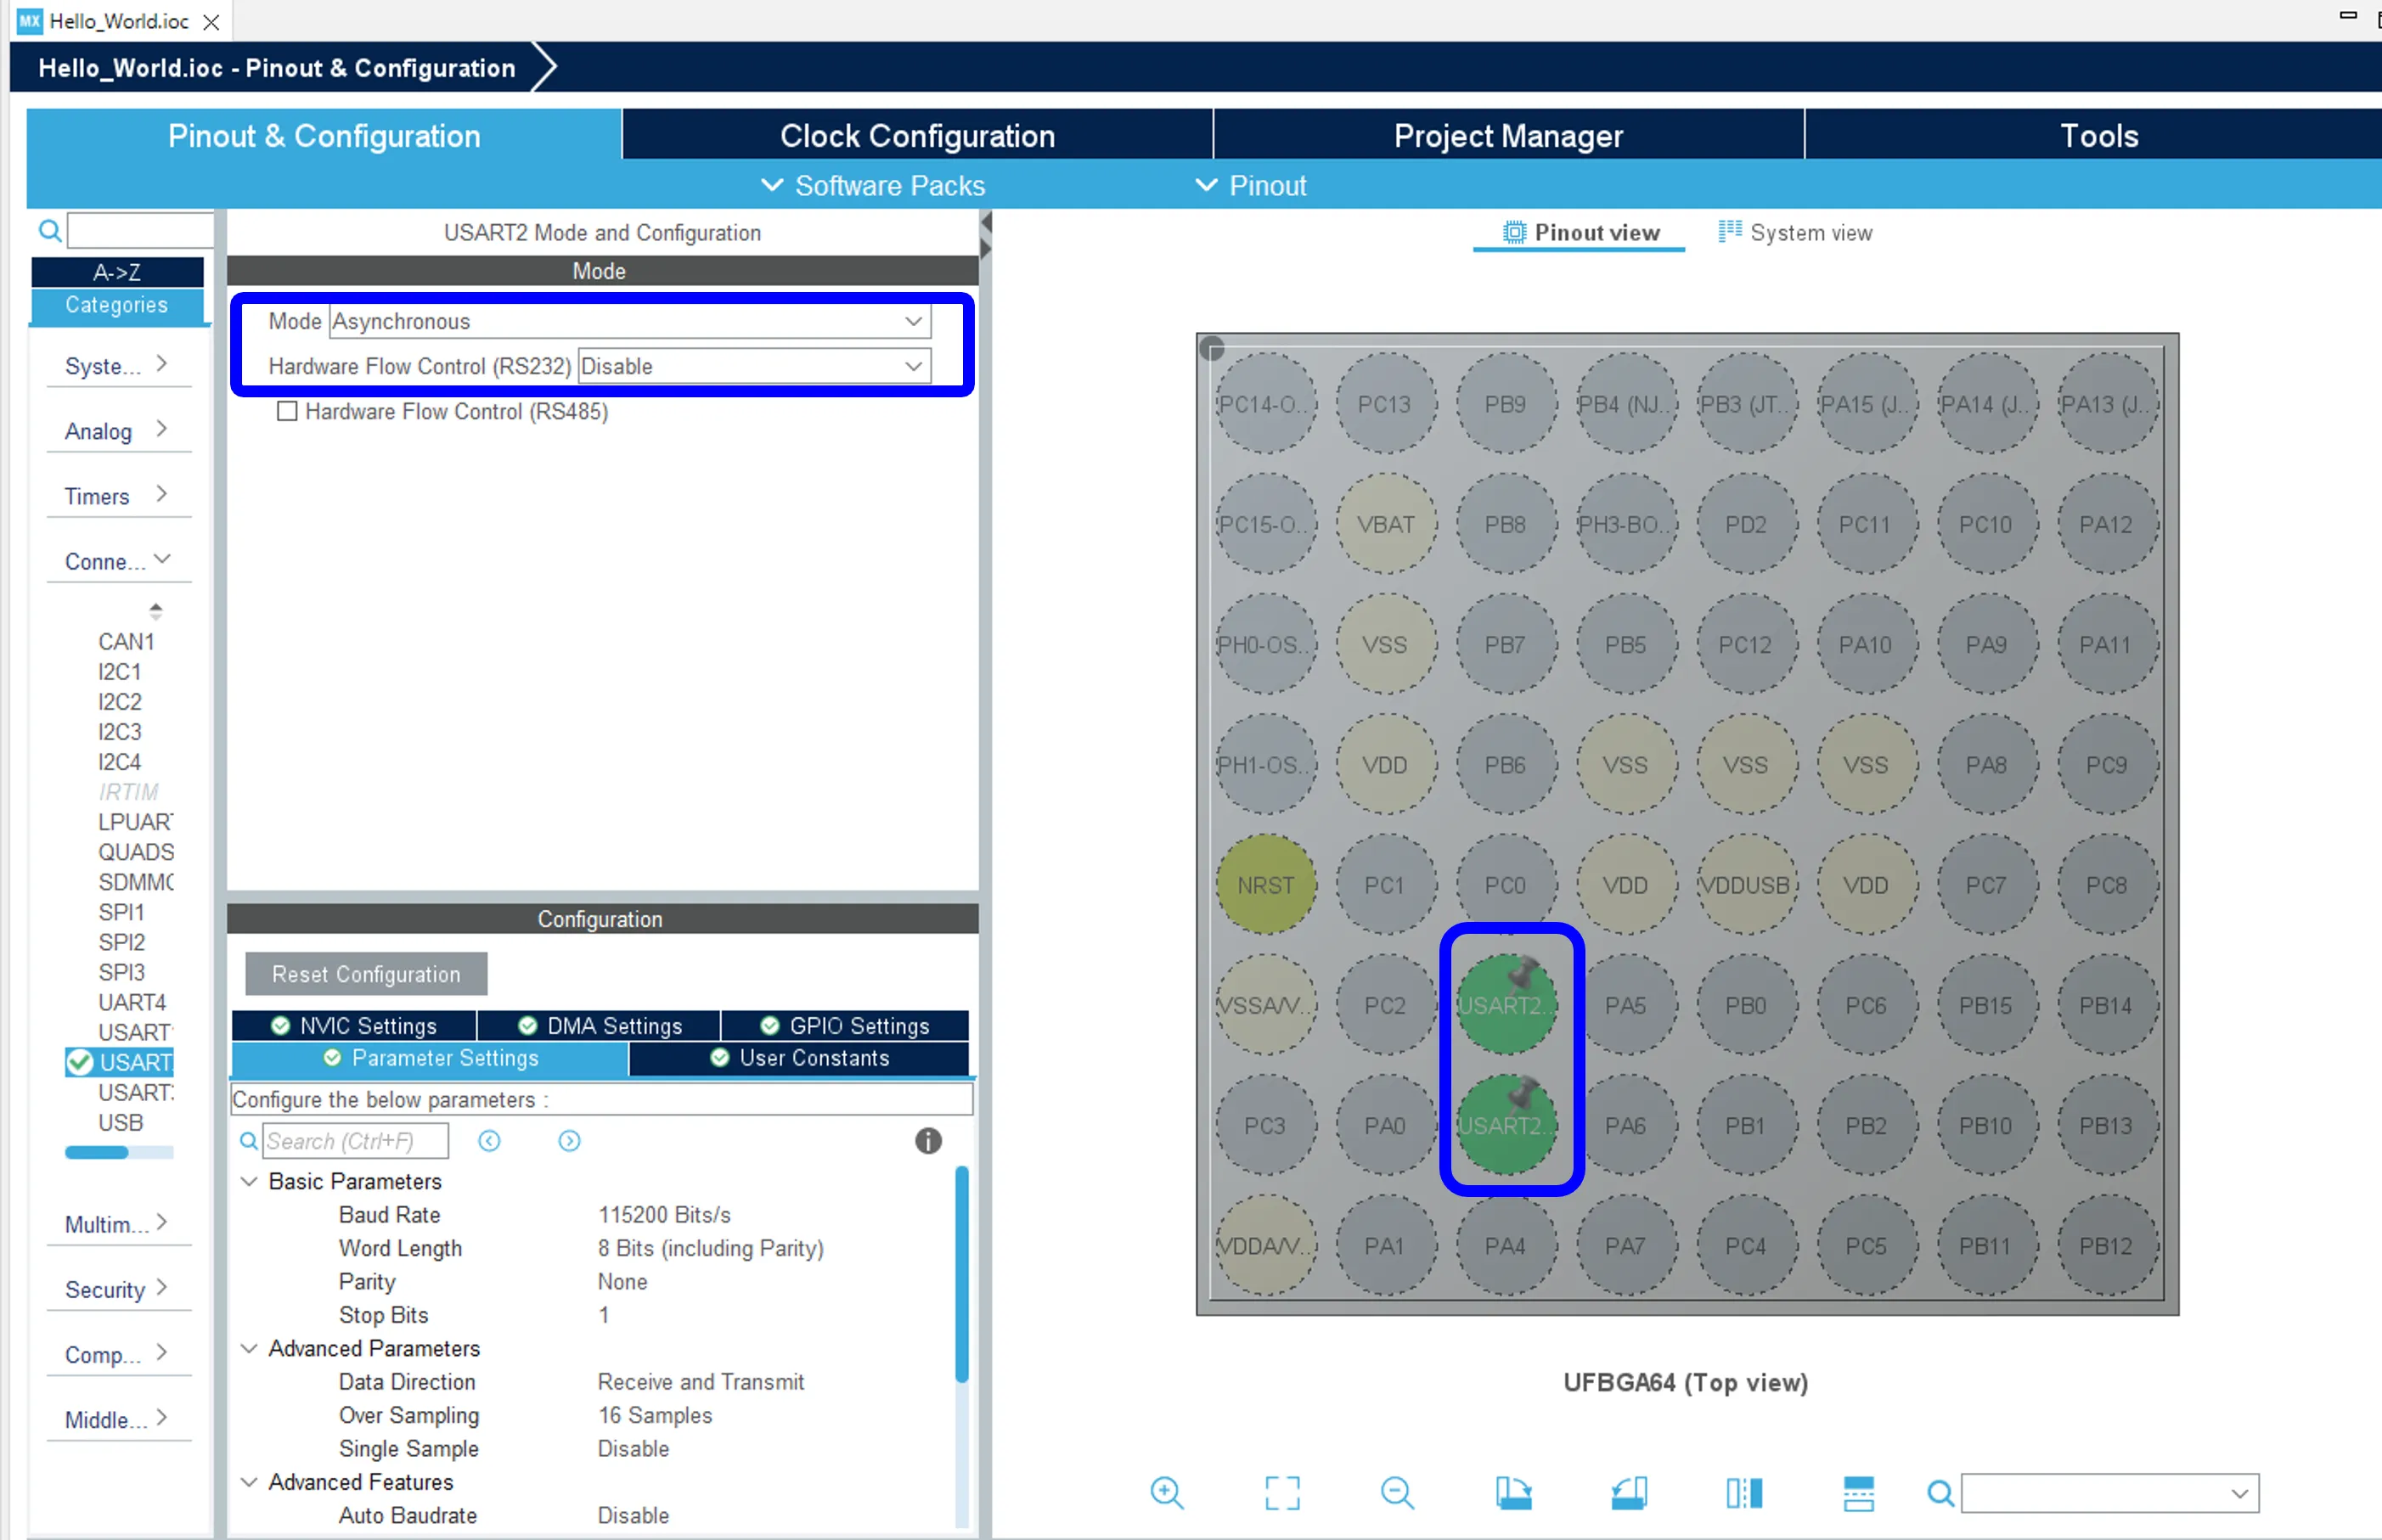
- Generate code and open the generated
main.c. Locate it in the project tree; source and build-output folders serve different purposes.
Add the code
Section titled “Add the code”Add code in the matching USER CODE blocks so you can identify it when regenerating code. Line numbers depend on the tool version and generated configuration.
Include the standard I/O header:
/* USER CODE BEGIN Includes */#include <stdio.h>/* USER CODE END Includes */Before calling printf, disable output buffering:
/* USER CODE BEGIN 1 */setbuf(stdout, NULL);/* USER CODE END 1 */Inside the generated main loop, print once per second:
/* USER CODE BEGIN 3 */printf("Hello World\r\n");HAL_Delay(1000);Add _write to send printf output through USART2:
/* USER CODE BEGIN 4 */int _write(int file, char *ptr, int len){ HAL_UART_Transmit(&huart2, (uint8_t *)ptr, len, 10); return len;}/* USER CODE END 4 */Choose Project → Build All. Fix any build errors and locate the generated Hello_World.elf in the active build output folder, commonly Debug. Use the actual filename and path from your project.
Upload with STM32CubeProgrammer
Section titled “Upload with STM32CubeProgrammer”Uploading replaces the program on the MCU. See Restore the demo if you want to run the kit demo again later.
- Connect the USB leaf as shown in Connect to PC. Set AP03’s program switch to Program, then press Reset.
- Open STM32CubeProgrammer and choose UART. Select the connected port, baud rate
115200, even parity, 8 data bits, 1 stop bit and no flow control, then select Connect. - In Erasing & Programming, select your generated
.elfand enable Verify programming. - Select Start Programming and check for Download verified successfully. A completed build alone does not confirm an upload.
- Disconnect STM32CubeProgrammer, return the AP03 switch to Run, then press Reset.
Check serial output
Section titled “Check serial output”- Open the serial terminal and select the same port. Close other applications that hold the port.
- Set it to
115200baud, 8 data bits, no parity, 1 stop bit and no flow control. - Check that
Hello Worldappears once per second. If it does not, check the Run switch, Reset, selected port and baud rate.
Import a project
Section titled “Import a project”- Start STM32CubeIDE and choose your workspace.
- Use File → Open Projects from File System (the menu may also mention archives) to select the downloaded project folder, then finish importing.
- Open Window → Show View → Project Explorer if the project list is hidden.
- Build the imported project, then use the upload procedure above. If migration is requested, retain a copy of the original project and review changes before rebuilding.
For debugging instead of UART uploads, see Connecting the debugger.