Wi-Fi touch sensor
Overview
When shipped from the factory, Arduino sketches are written on the ESP32 MCU leaf, so the touch sensor values can be sent via Wi-Fi from a smartphone or PC, and the display will appear.
Leaf to use
Use the following leaves.
| Type | Name | Q’ty |
|---|---|---|
| AP02 | ESP32 MCU | 1 |
| AV04 | 2V~4.5V | 1 |
| AX07 | Back to back | 1 |
| AX08 | 29pin header | 1 |
| AZ62 | Connector Cover | 2 |
| AZ63 | Nut Plate | 2 |
| AAA battery holder | 1 | |
| AAA battery | 3 | |
| M2*15mm screw | 4 | |
| φ10x2mm magnet | 1 |
Assembly
Assemble the leaves as shown in the figure below.

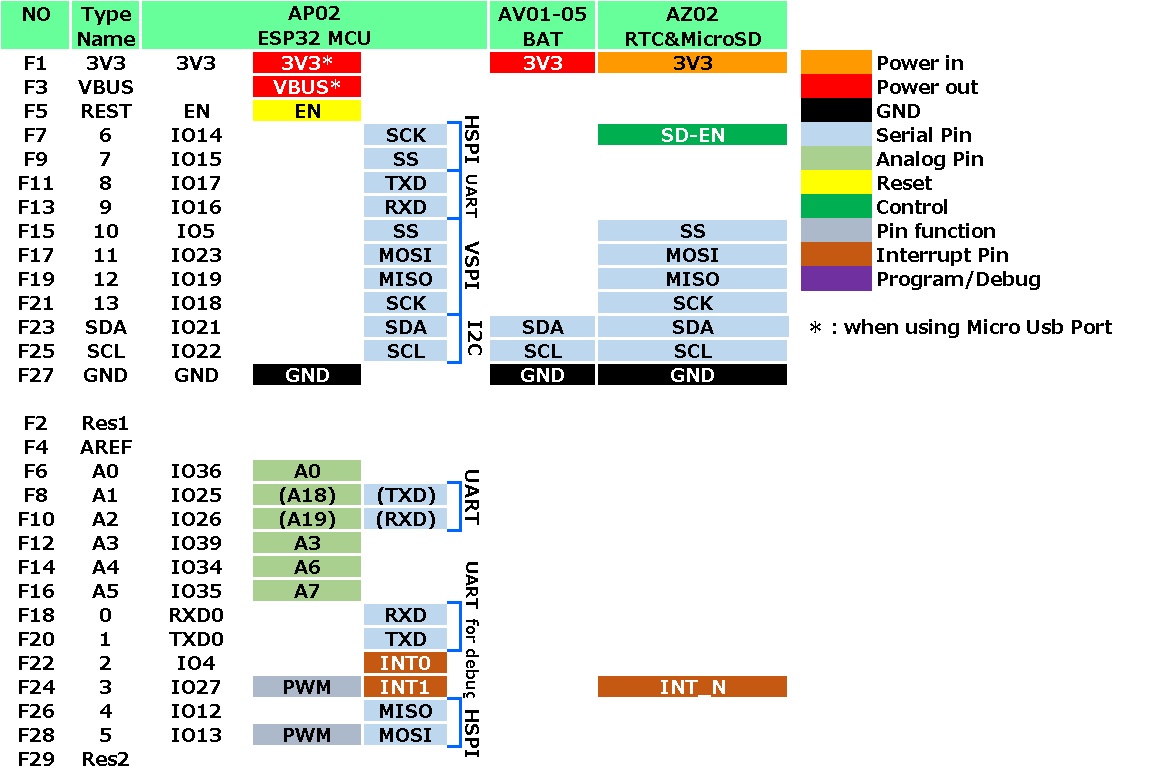
Pin assignment
Refer to the figure below for the pin assignment of each leaf.
Source code
The sketch to be used can be found in the GitHub repository below.
Leafony/Sample-Sketches/ESP32_AP_Touch - GitHub
Execution method
- Insert the batteries into the AAA battery box and turn on the ESP32 leaf power switch.
- Connect to the following Wi-Fi with your PC or smartphone
- SSID: Leafony_ESP32-AP
- Password: password
- Launch a web browser on your PC or smartphone and go to http://192.168.4.1.
- Pins 7, 9, 22, 24, 26, and 28 of the 29-pin header are assigned to the touch sensor.
When the pin is touched, the capacitance decreases and the value decreases. When the value falls below the threshold of 20, “Touch detected” is displayed.
(Pin 24 is hidden in the sample sketch because it interferes with the RTC & microSD. The detection threshold can be changed in the sketch. In the following picture, I am touching pin 26 with my fingertip.)

- When you touch pin 26, the browser display will change as shown below.

Last modified 15.03.2021
