Google Sheets IoT
Overview
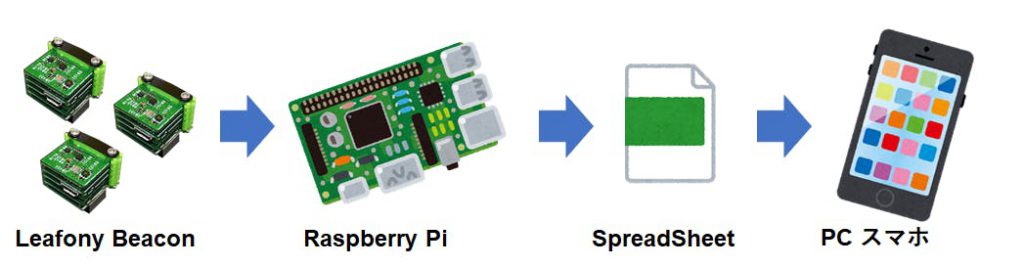
We will create an IoT environment sensor using Leafony Beacon1) and Raspberry Pi, and visualize the sensor data using Google Spreadsheet.
- Beacon is a facility for acquiring various information including location by receiving radio waves on the ground with a specific device. in the case of Bluetooth Beacon devices, a module equipped with sensors such as temperature and air pressure can be installed at any location to observe the environment of that location.
What to prepare
- Leafony Basic Kit
- Raspberry Pi (3, 4, zero, etc.)
- PC or smartphone with browser access
- Arduino IDE
Sample app code
Preparing the Raspberry Pi
- If you are new to Raspberry Pi, the Raspberry Pi 3 B+ Starter Kit (https://www.switch-science.com/catalog/3880/) is useful. The microSD containing the Raspbian OS image is included, but the display, keyboard, and mouse are not. The display, keyboard, and mouse are not included.
- The Raspberry Pi will be connected to the Internet via a wireless LAN. Please prepare this in advance as well.
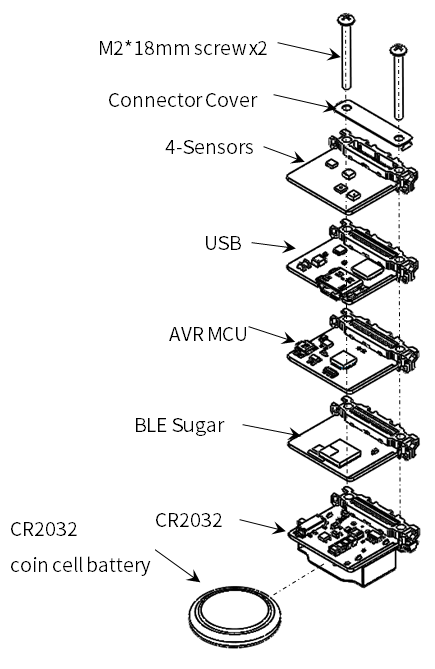
Leafony Configuration
| Type | Name | Q’ty |
|---|---|---|
| AZ62 | Connector Cover | 1 |
| AI01 | 4-Sensors | 1 |
| AZ01 | USB | 1 |
| AP01 | AVR MCU | 1 |
| AC02 | BLE Sugar | 1 |
| AV01 | CR2032 | 1 |
| - | CR2032 coin cell battery | 1 |
| - | M2*18mm screw | 2 |
Assembly
Writing sketches
- The BLE and 4-Sensors libraries are required for writing. Please include the libraries beforehand. See here for details.
- In the Arduino IDE, write the following sketch on the microcontroller board. ・leafony_beacon.ino
- We have confirmed that it works with Arduino IDE 1.8.9. If you get a write error, please check your IDE version.
Building the Raspberry Pi environment
We will use a Raspberry Pi as the receiver for the BLE Beacon. In the sample code we will be using, we use Node.js to receive the BLE Beacon using noble. The received data is written to a Google spreadsheet via Google API.
Execute the following script (6 items) to build the environment. https://github.com/Leafony/leafony-beacon/tree/master/spreadsheet-logger
sudo apt update
sudo apt upgrade
sudo apt install -y bluetooth libbluetooth-dev libudev-dev git
git clone https://github.com/Leafony/leafony-beacon
cd leafony-beacon/spreadsheet-logger
npm install
Note: WARNING will be displayed, but please continue.

Getting the Google Sheets API
In order to manipulate Google Spreadsheets in Node.js, we need to obtain an API. First, in Step 1 of Node.js Quick Start below, click Enable the Google Sheets API, and download credentials.json. Next, copy the credentials.json to the leafony-beacon/spreadsheet-logger directory.
Node.js Quickstart | Sheets API | Google Developers : https://developers.google.com/sheets/api/quickstart/nodejs
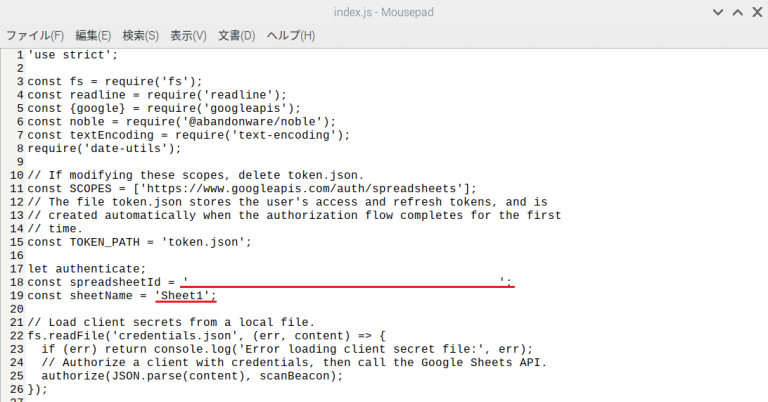
Setting Google Sheets ID and sheet name to index.js
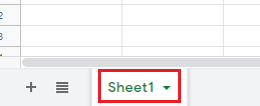
Open the Google Spreadsheet and check the “Sheet ID” and “Sheet Name” in the red line of the URL.

leafony-beacon/spreadsheet-loggerディレクトリ「index.js」があります。「index.js」の18, 19行目にある「spreadsheetId」と「sheetName」に、上記の「シートID」と「シート名」を貼り付けることで、データが書き込まれます。
アプリの実行
Raspberry piのターミナルに「sudo node .」と入力してEnterをクリックしてください。

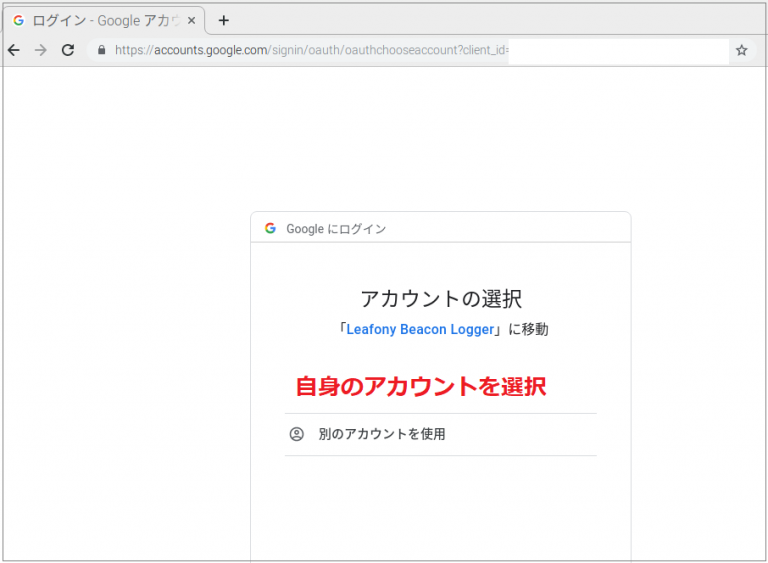
上記URLにブラウザでアクセスすると、Googleアカウントに移動し、ご自身のアカウントを選択します。
「詳細」をクリックしてください。
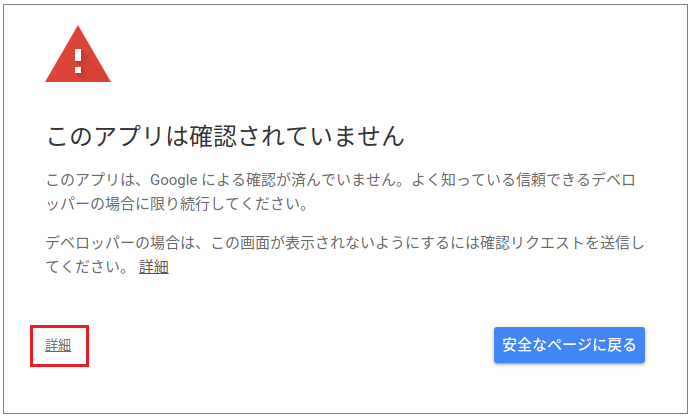
「Leafony Beacon Logger「安全ではないページ」に移動」をクリックしてください。
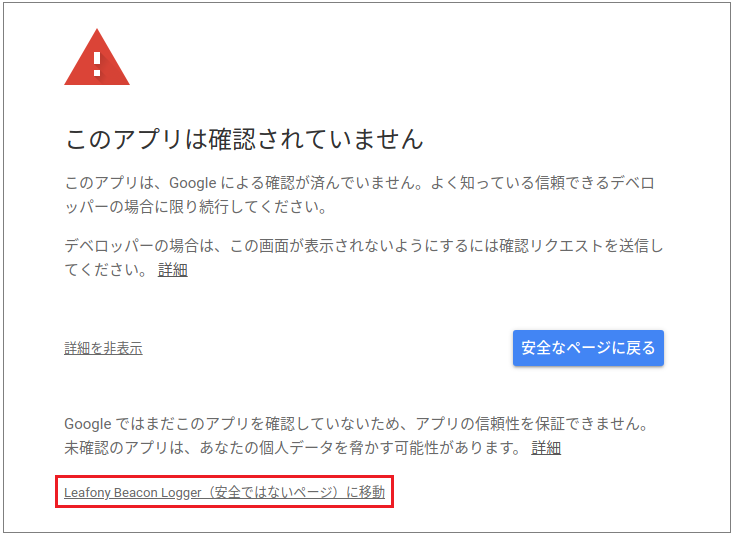
「詳細」をクリックしてください。
「Leafony Beacon Logger「安全ではないページ」に移動」をクリックしてください。
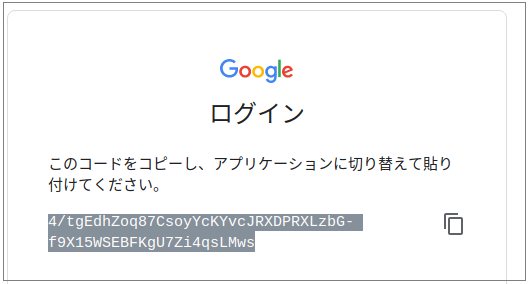
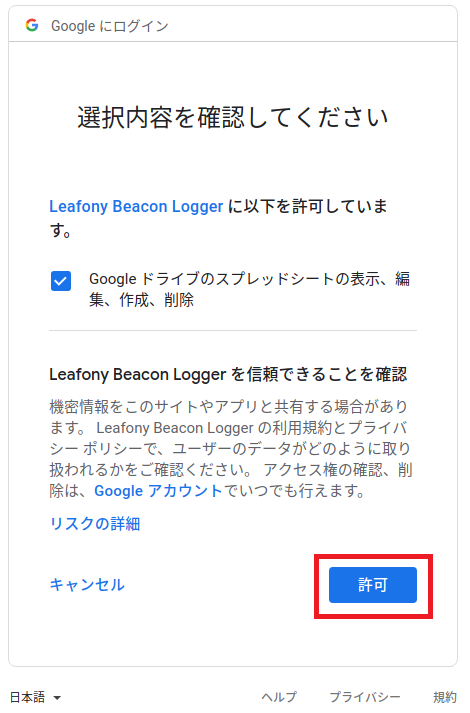
「許可」をクリックしてください。以下のコードをコピーしてください。ターミナル内に貼り付けると、「token.json」というファイルが生成されたあとに、beaconのスキャンが始まります。
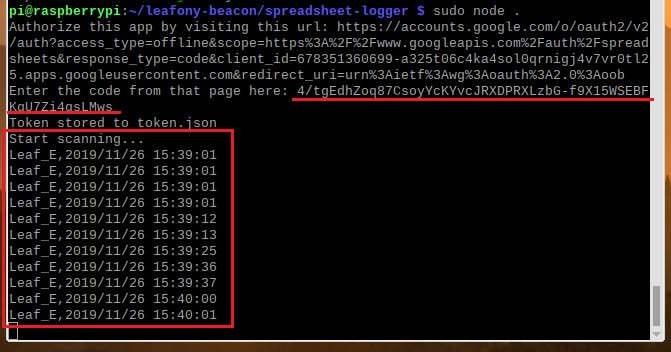
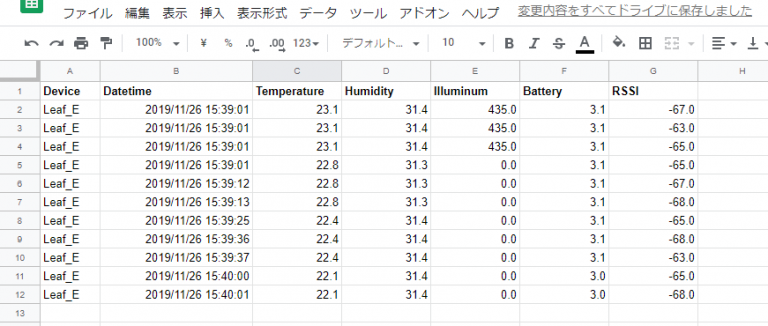
Beaconが見つかるとログが表示されると同時に、スプレッドシートに同じ内容が追記されるので、スプレッドシートを開いてデータを確認してください。